This tutorial will show you how to create a ruby item as well as a ruby sword and pickaxe that can be crafted using that ruby. It will also demonstrate how to use the item set on a server. This tutorial will not show you everything you can do with this plug-in (that would become a long tutorial). I may or may not make more tutorials, depending on the number of requests I get to do so and on how much time I have. This tutorial will assume you already have a (1.12 or later) minecraft server and that you have access to its files.
If you haven't done this already, you should start by downloading the editor from BukkitDev. Download the latest Editor from the Files section. For this tutorial, I will be using Editor 5.6. It doesn't really matter where you put the editor you downloaded, but you should be able to find it later.
The editor is a java application, which means that you need to have Java installed on your computer in order to use it. If you are using Windows, Java was very likely installed by default, so you can use the editor right away. If you are using a Mac, you probably have it as well, but I never tried that. If you are on Linux, it was probably not installed by default, but you should know what you are doing if you choose to use Linux. If you don't have it, you can download java 8 from here.
Now you should open your file explorer and navigate to wherever you put the editor when you downloaded it. Then double click on it to start it. If everything is alright, you should see the following window (or something similar if you are using another version of the editor):
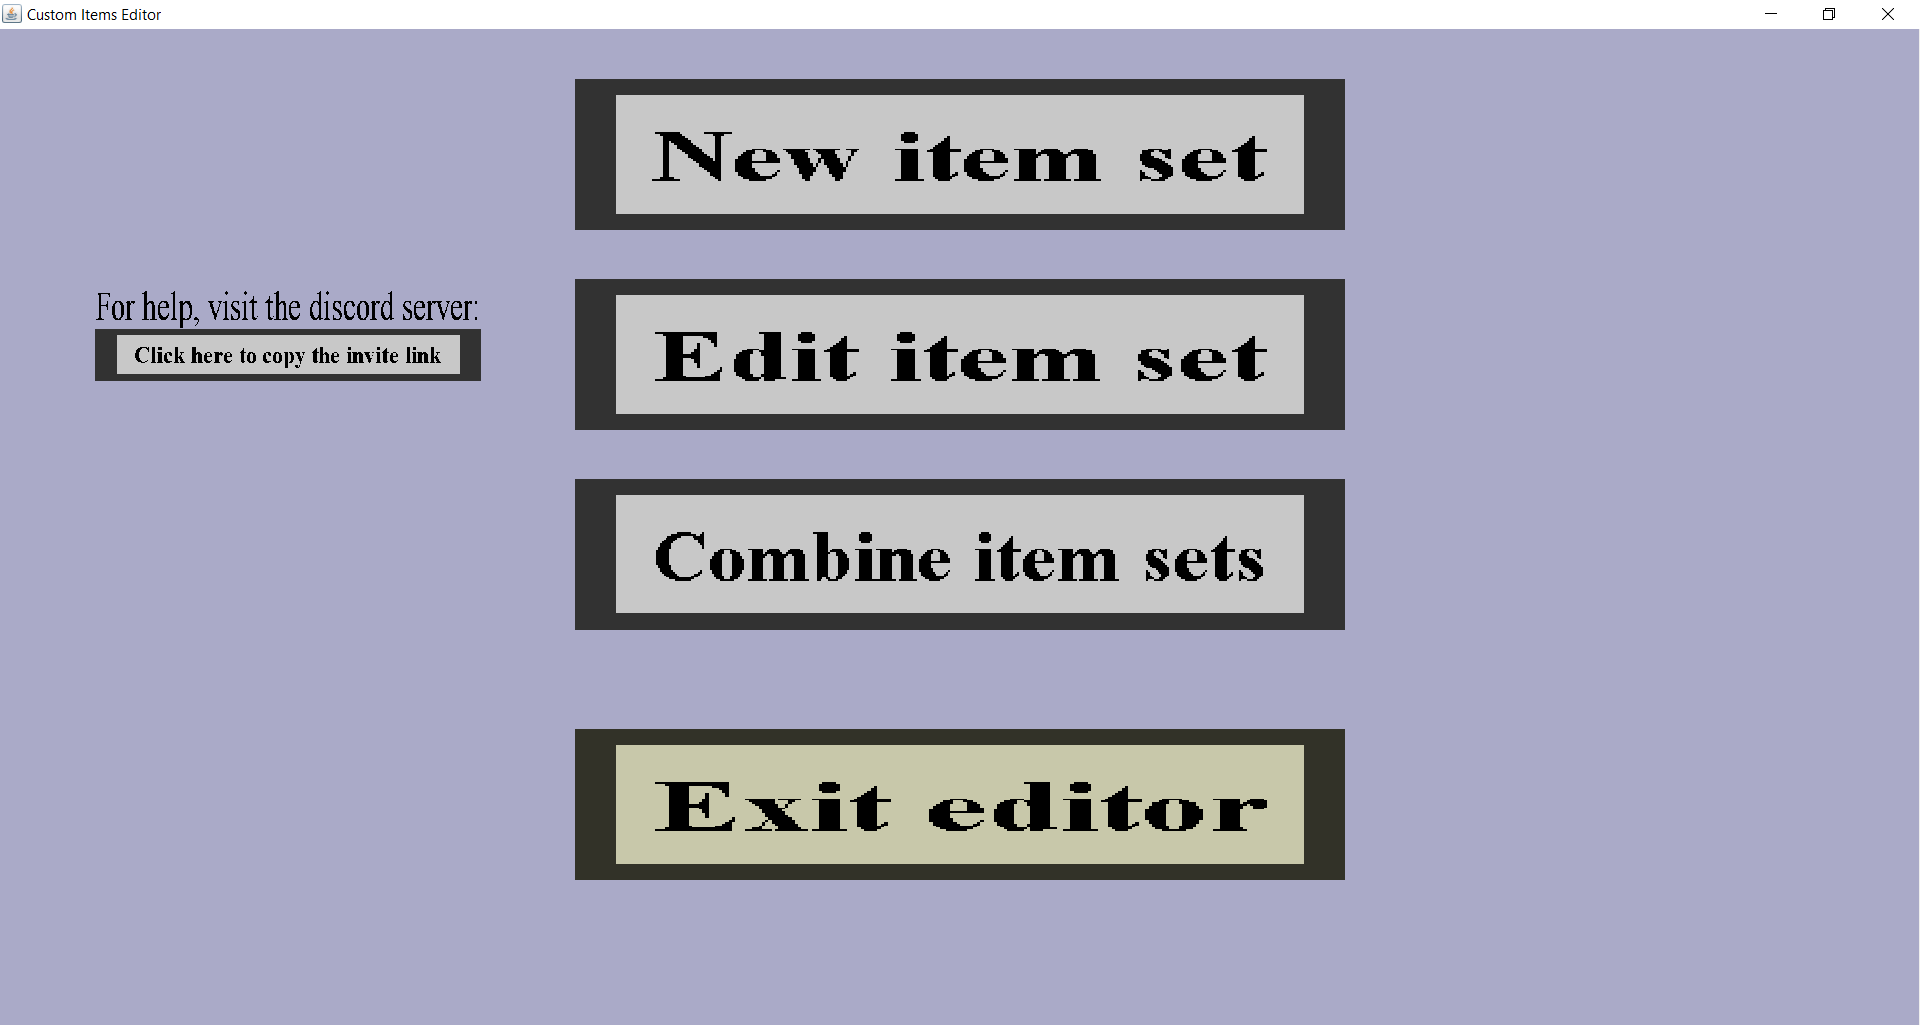
Yeah yeah, it isn't pretty, but the alternative would be writing long configuration files and resourcepacks with many item models and resourcepack predicates with some text editor.
To use this plug-in, you will need to create your own item set in the editor. It will contain all items, textures, models, recipes and everything else related to the plug-in. You can only use 1 item set at a time in your minecraft server, so you should usually have just 1 item set.
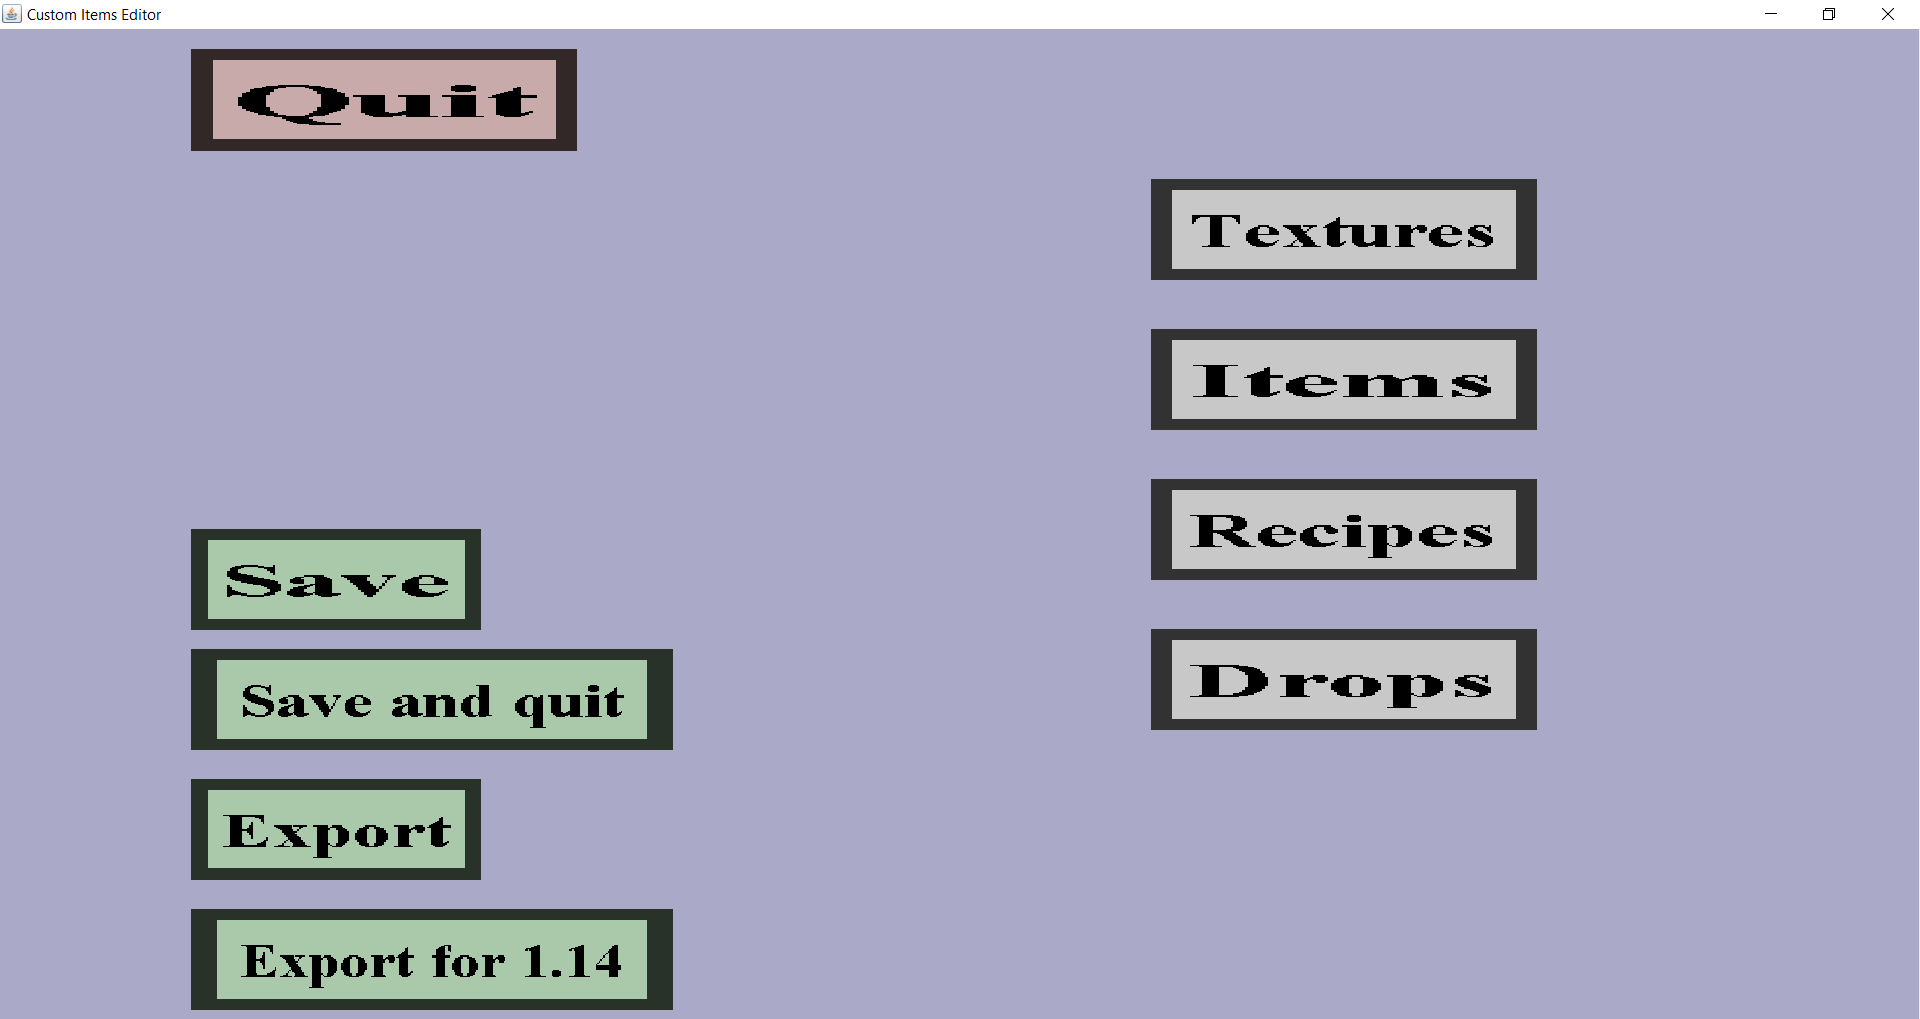
To get started, click on the 'New item set'. You should see a simple (and ugly) menu where you need to select the name of your item set. If you just have 1 item set, the name doesn't really matter. The name will be used to determine some file names for files that will be created later, so don't use special characters in the name. To type the name, click on the edit field at the right of the 'Filename:'. It should turn white when you click on it, which means it is waiting for you to type something. Once you have typed the name, click on the 'Create' button. If everything went well, you should see something like this:
The whole point of this plug-in is that you can add custom items with their own textures without the need for any mods or overwriting textures of other items.
You will be the one that needs to create their textures. The editor is not an image editor, so you will need some other program to create your images. I would recommend to use paint.NET for this (it's an application, not a website). However, you are free to pick whatever program you want. Use your image editor to create images of 16 by 16 pixels, 32 by 32, 64 by 64, 128 by 128, 256 by 256 or 512 by 512 images. You should save them on your computer and remember where you stored them. Please note that all images you create will be put in a resourcepack and players will have to download that resourcepack the first time they join the server and whenever you update the item set on the server, so using many big images will cause them to wait for a while because they would have to download a big resourcepack. Also, the editor will take more time to save and load if there are many big images. The textures I will be using are:


Now that you made your textures and saved them as images on your computer, go back to the editor and click on the 'Textures' button. This should bring you to the texture overview page, which is almost empty because you haven't loaded any textures yet. Click on the 'Load texture' button to load your first texture into the item set. Click on 'Load simple texture' because we won't be making bows this tutorial. Clicking on the 'Edit...' button will bring you to the (ugly) file selection menu. It will start in the folder where the editor is located and it will show all folders and .png files in the current folder. If there are many files, you can scroll with the mouse wheel or the arrow keys. The 'Go up' button will show you the parent directory (the folder where the current folder is in). Navigate to wherever you stored your textures and click on one of them to select it. Then click on the 'Select' button to confirm the selection. When you confirm the selection, the editor will copy the selected image into the item set. If you modify the image thereafter, the texture in the item set will stay the same and you will have to explicitely edit it in the editor. The texture you selected should appear on the left of the 'Edit...' button. In my case, it looks like this:
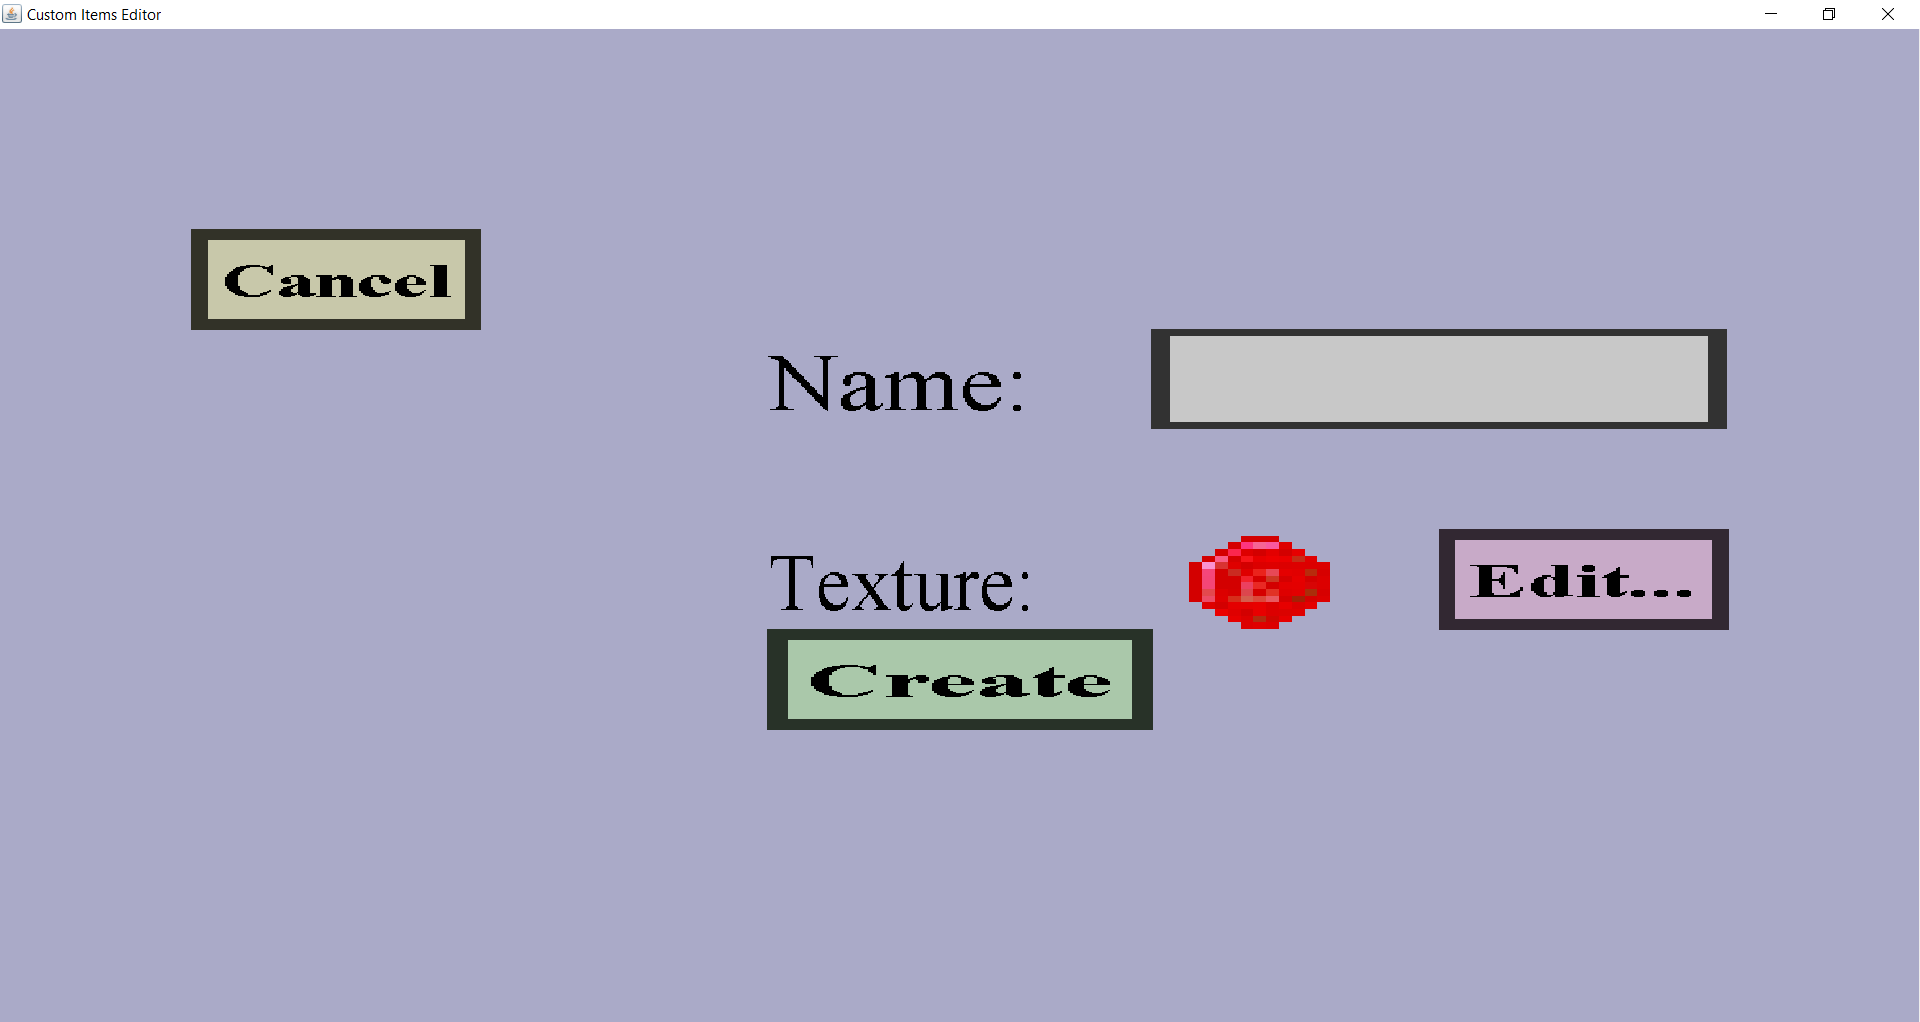
Now type the name of the texture in the edit field on the right of the 'Name:' label. The name is not allowed to have special characters, only the alphabet and the underscore _ are currently allowed. But don't worry, your players won't see the name of the texture in-game anyway. All they can see in-game is the display names of the custom items using that texture. The names of the textures are not secret either though, players can retrieve them if they know what they are doing. Once you typed the name, click on the 'Create' button.
After clicking 'Create', you should go back to the texture overview, but this time you should see the texture you uploaded in the overview. Now you should load the textures for the sword and pickaxe as well. I won't demonstrate this again, because the process is exactly the same. After you loaded all 3 textures, click on the 'Back' button in the texture overview.
Now that you have loaded the textures, it is time to make the custom items. Click on the 'Items' button, this will bring you to the (currently empty) item overview. To create your first item, click on the 'Create item' button. Now you can choose what kind of item you would like to create. By the time of writing this, there are 13 kinds of items to choose from, and this will likely become more in the future.
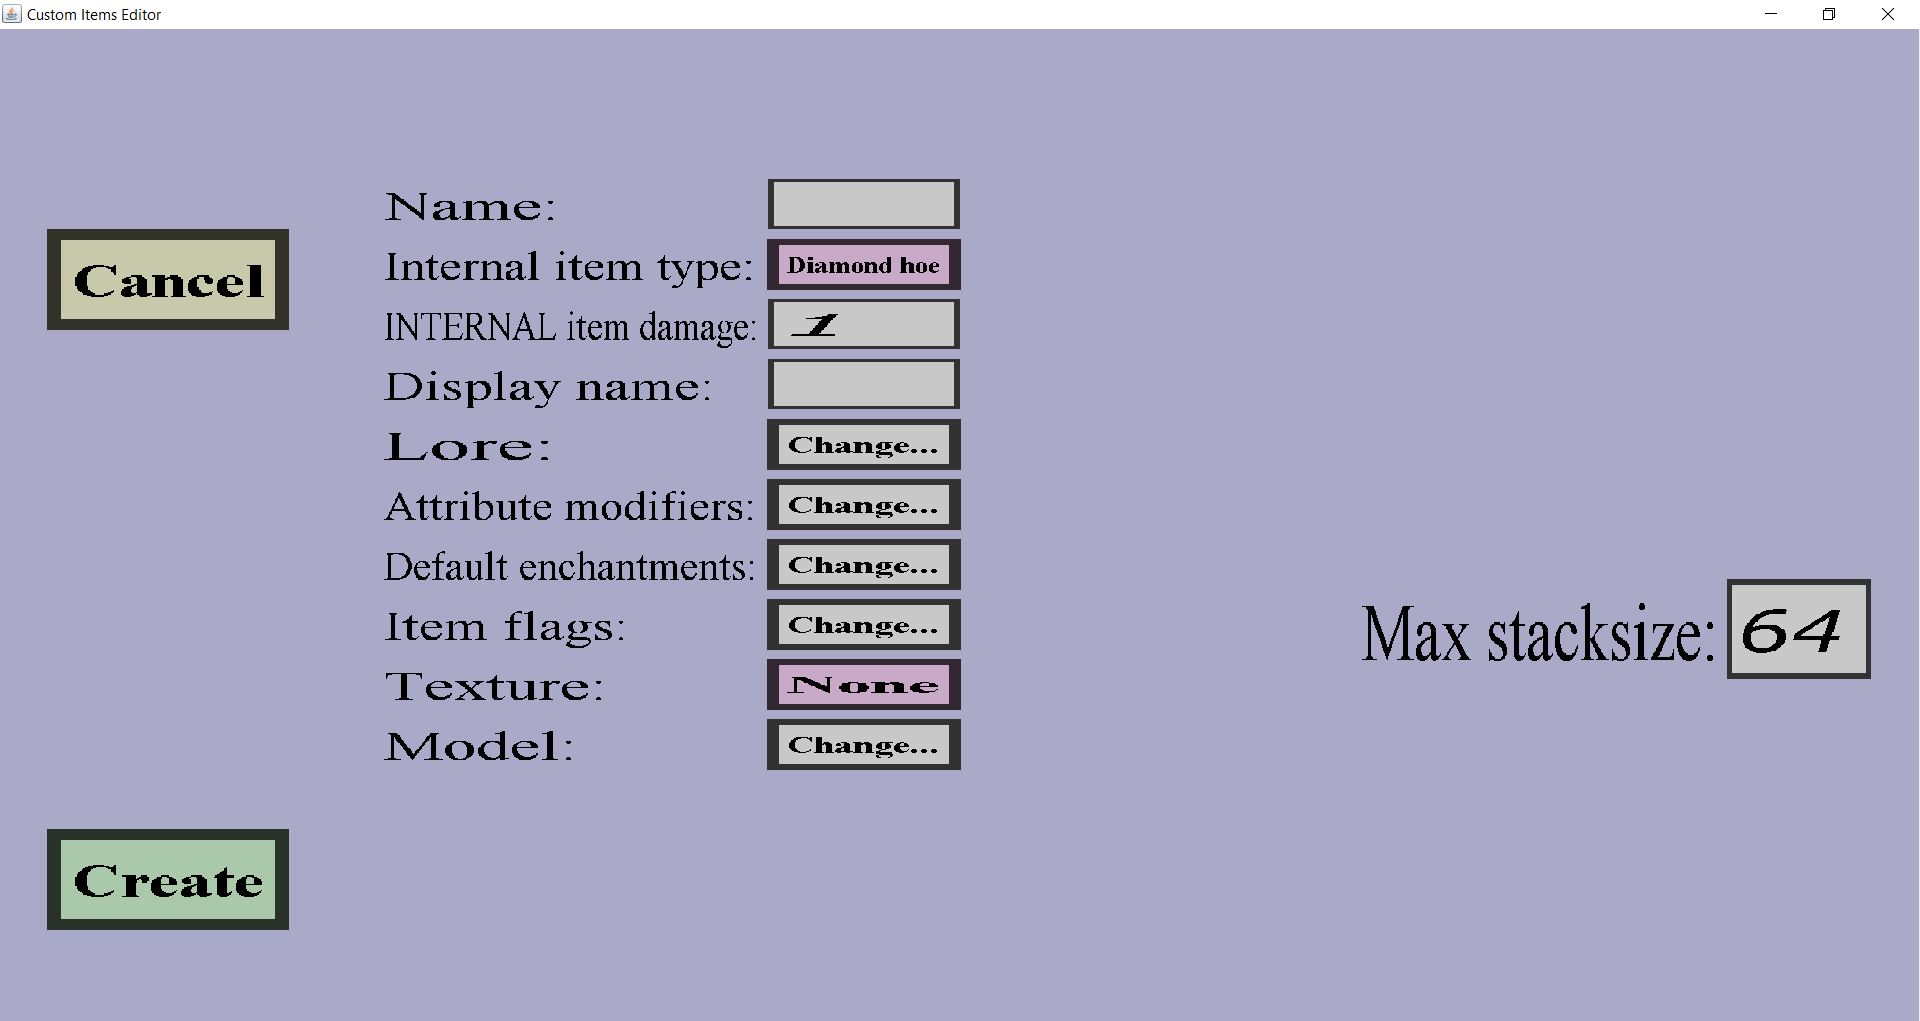
As you can see, you can choose a 'Name' and a 'Display name'. The display name is the name players will see in-game. You can use uppercase characters and whitespaces within the display name to get it how you want it. You can also use the & character to use color codes in the display name if you like. You can use this website to generate color codes for the items. (You can copy them from that website and paste using control V in the Editor.) The 'Name' of the item is like the name of textures, normal players won't see it in-game and you can't use special characters in it. However, server operators can see the names of all custom items using the '/customitems list' command and will need those names for the '/customitems give [custom item name]' command. For the 'Name', I will simply use 'ruby' and I will use 'Ruby' for the 'Display name'. Besides the name and display name, you will also need to select the Texture of the item. To select the texture, click on the 'None' button on the right of the 'Texture:' label. Then click on the 'ruby' label on the right of the ruby texture to choose it. As you can see, there are many other things like Attribute Modifiers and Item Flags. For the simply ruby item, we will ignore these, but we will explain some of them when creating the sword and pickaxe. Now click on the 'Create' button to add the ruby item to the item set.
Now that you have added the ruby item, it's time to add the ruby sword. To start creating the sword, click on 'Create item' and then on 'Sword'. You should then see a menu similar to the menu where you created the ruby, but with even more options. The name and display name work the same as before, so you can just use 'Ruby Sword' as display name and 'ruby_sword' as name. The texture also works the same as before, but choose ruby_sword as texture instead of just ruby.
Until now, everything was basically the same as with the ruby item, but the next will be different. First, let's determine how much damage the ruby sword is going to deal. There are only 2 ways to do this, and these ways are Attribute modifiers and Default enchantments (with damage all/sharpness enchantment). Using default enchantments for this would prevent players from enchantment the sword because it will be enchanted immediathly when it is crafted (and you can't enchant items that already have enchantments). Also, it would look really dirty in general. The right way to do this is using Attribute modifiers. If you use them, everything will look normal. To start adding attribute modifiers, click on the 'Change...' button on the right of the 'Attribute modifiers:' label. Then click on the 'New Attribute' button. You should then see the following:
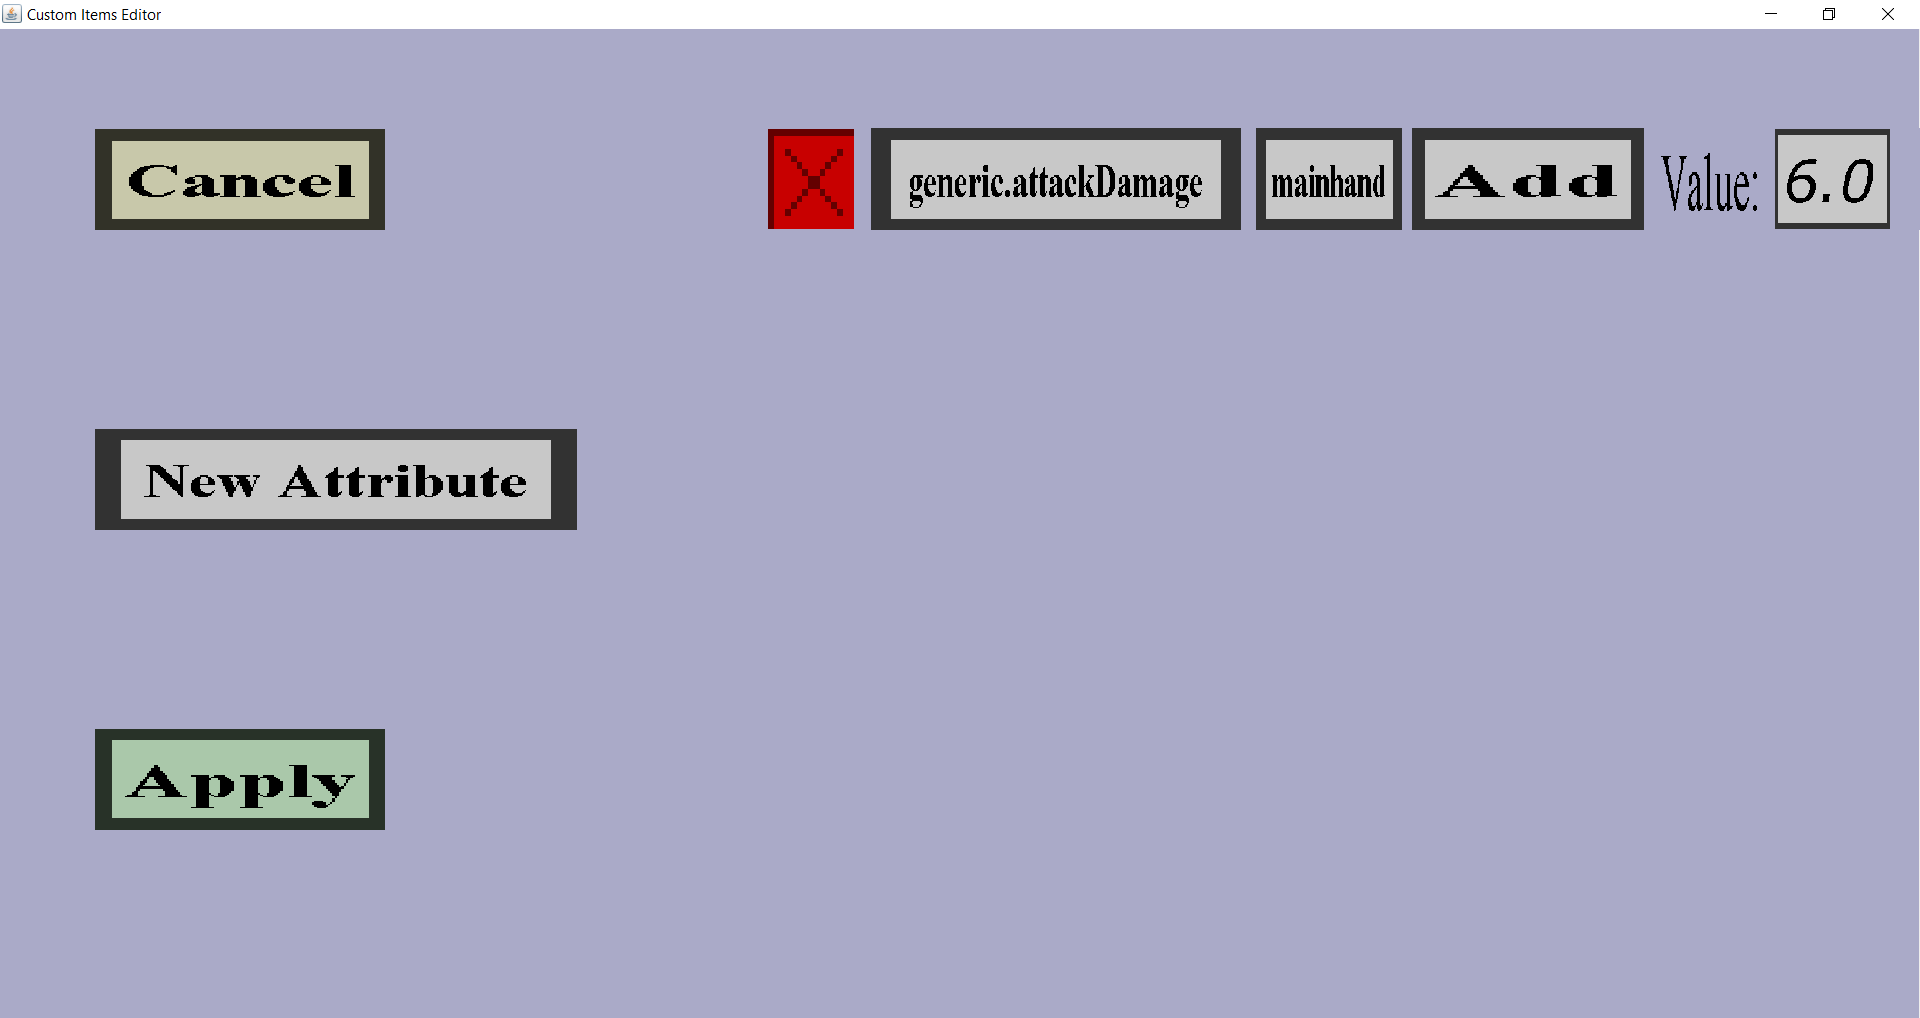
Clicking on the red cross button on the left would remove the attribute modifiers from the item. If you clicked it, just click on 'New Attribute' again. The 'generic.attackDamage' is the attribute that determines the attack damage of players (and mobs), this is what you will need. If you click on it, you can choose another attribute modifier, but that's not what we want right now. The 'mainhand' is the slot where the attribute modifier will have effect. This means that players will get more attack damage when they hold the ruby sword in their main hand, which is exactly what we want. You could change the slot by clicking on it, but let's not do that now. The 'Add' means that this sword will increase the attack damage of the player by the value of this attribute modifier. This is also how normal swords work, so let's keep it as it is. Clicking on it allows you to choose another operation. The 'Value' is how much the attack damage of the wielder will be increased. This amount is given in half hearts, so the current value of 6 hearts means that the attack damage will be increased by 3 hearts. The default attack damage of players is a half heart, so the total damage when wielding the sword will be 3.5 hearts. You can change the value if you want, but this value is quite reasonable, so I will keep it like this. Click on 'Apply' to confirm your changes and go back to the previous menu.
Next, you should choose the durability of your sword (the number of hits you can deal before it breaks). You can do this by editing the edit field on the right of the 'Max uses:' label. If you give it the value -1, the sword will become unbreakable, so it will never break no matter how often you use it. You can also choose the 'Internal item type' of the ruby sword. For simple custom items, this value is not interesting. But for swords, this has some effect. To change it, click on the 'Iron sword' button on the right of the 'Internal item type:' label. You should be able to choose all minecraft sword types. The internal item type is the item you will see when you disable the resource pack. For swords, it determines the enchantability and the block break speed. The enchantability is default minecraft behavior, it affects the levels of the enchantments the item will get when it is enchanted. For instance, stone swords will usually get lower enchantments than golden swords. The block break speed affects the speed at which the sword will be able to destroy blocks like cobwebs. (Breaking cobwebs with wooden swords takes more time than doing it with golden swords.) The ruby sword will get the same enchantability and block break speed as the internal item type has in normal minecraft. There are even more options to customize the sword, but this is all I will show in this tutorial. Click on 'Create' to add the sword to the item set.
Creating a pickaxe is almost the same as creating a sword, but there are some differences. Like the sword, click on 'Create item'. But then click on 'Pickaxe' instead of sword. Just like the ruby and the ruby sword, you can choose a name and a display name. Just like the ruby sword, you can use attribute modifiers to set the attack damage of the pickaxe. Also, you can set the max uses of the pickaxe just like the max uses of the sword. For the internal item type, there are some differences. Like swords, the internal item type determines enchantability and digging speed, but it also determines what ores you can mine with it. So the ruby pickaxe will only be able to mine obsidian if you choose 'Diamond pickaxe' as internal item type. Also, the digging speed is usually much more important for pickaxes than it is for swords. You could use default enchantments to increase the digging speed with the efficiency enchantment, but that will prevent players from enchanting the pickaxe. When you have chosen the values you like, click on the 'Create' button to also add the ruby pickaxe to the item set.
Now that you have created all the items, it's time to create their crafting recipes. To get started, click on the 'Back' button (if you are still in the item overview) and then click on the 'Recipes' button. That should bring you to the (currently empty) recipes overview.
Let's first create a crafting recipe so that you can craft a ruby. I will simply use redstone dust and an emerald for this in this tutorial. Click on the 'Create shapeless recipe' button, you should then see the following menu:
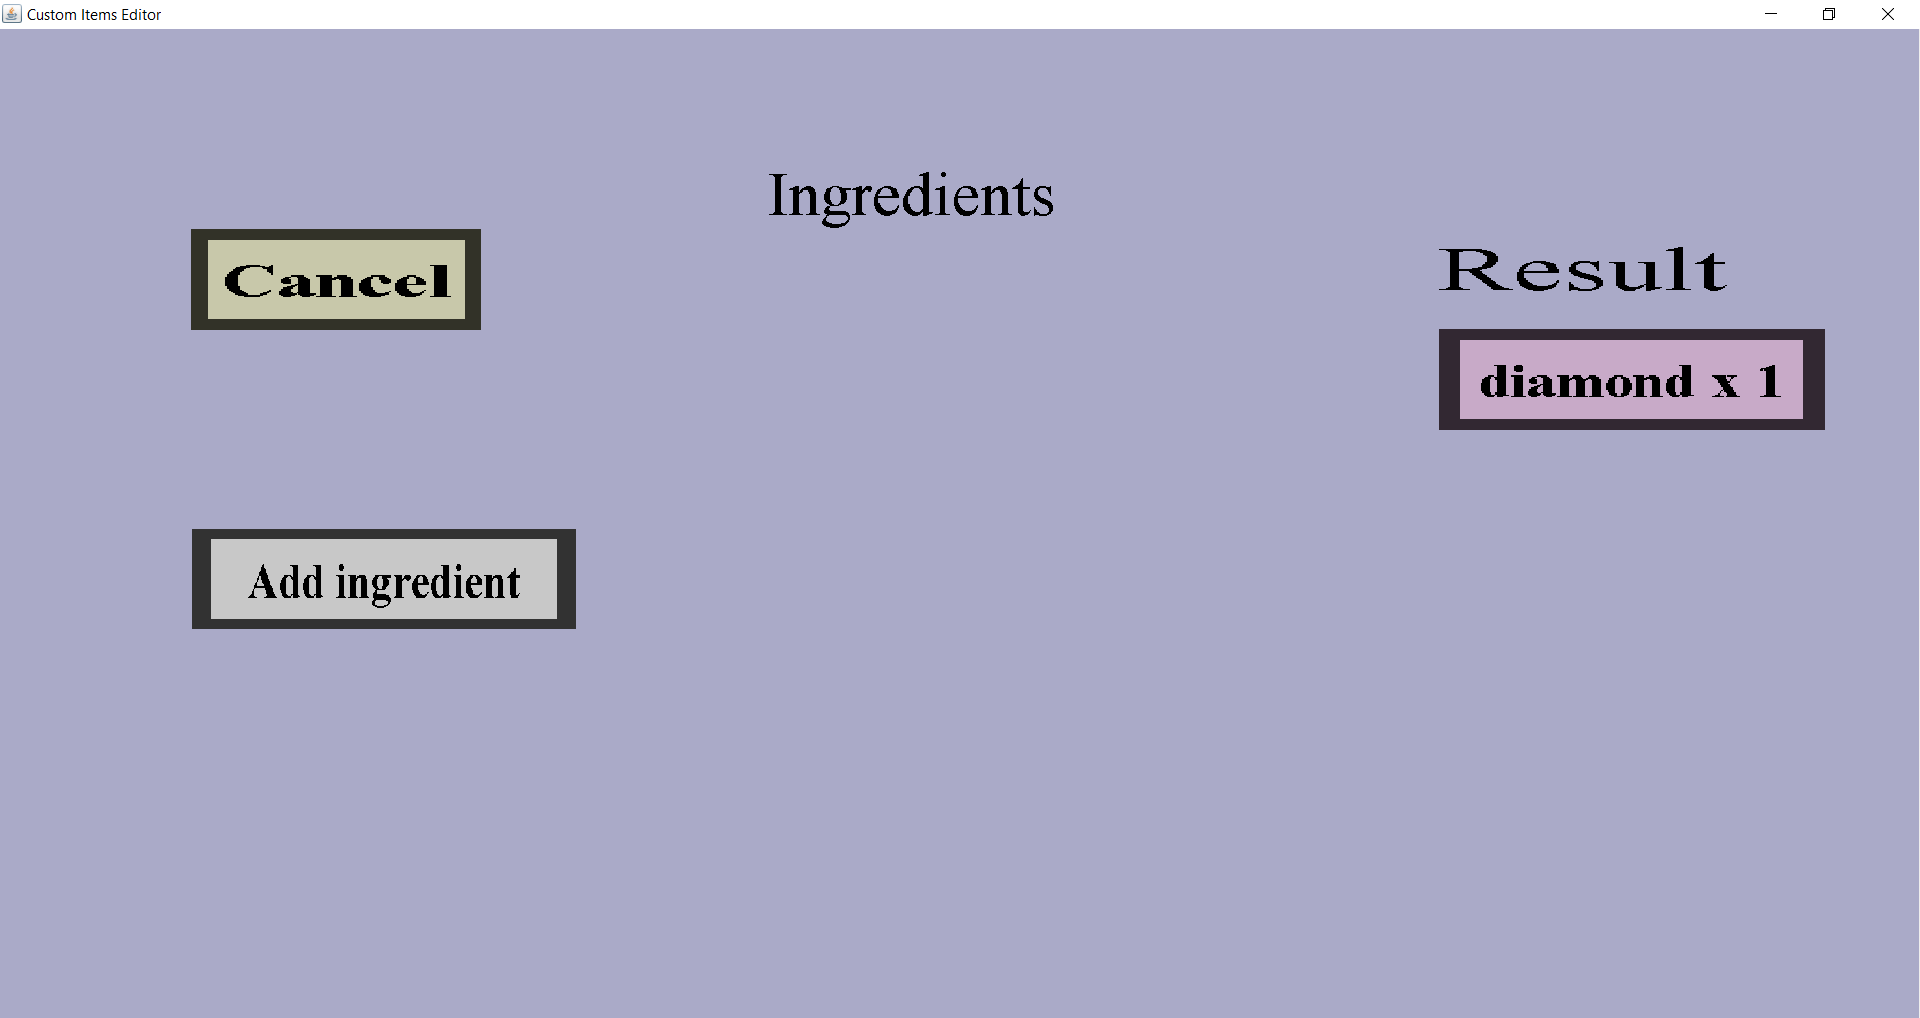
This is the menu for creating shapeless recipes. For these recipes, it doesn't matter in which order players put the ingredients. Click on 'Add ingredient' to choose the first ingredient. You can use custom items and vanilla minecraft items in your recipes. In this recipe, we will only use vanilla minecraft items, so click on 'Simple vanilla item'. Then you will get to a menu where you can choose which vanilla item to use. I suggest using the search edit field under the 'Search:' label to spare yourself some long scrolling. Simply type 'emerald' there and the list of items should suddenly become very small. Then click on 'emerald', which should bring you back to the shapeless recipe edit, but now with an emerald as ingredient. Then add redstone as ingredient the same way you added emerald. So far the ingredients of the recipe, now it's time to set the result of the recipe. To change the result, click on the button below the 'Result' label. The text of that button shows the current result of the recipe, which is currently a diamond because that's the default. Then click on the 'Change' button, which should bring you to a menu that seems familiar. The result will be a ruby, which is a custom item, so click on 'Custom Item'. Then click on 'Ruby', then on 'Select'. You should see that the text of the button below 'Result' has changed. Now that you have chosen the ingredients and results, you are done with the recipe, so click on 'Apply'.
Next, we will create a crafting recipe to create the ruby sword. This will be the basic sword recipe, so a stick at the bottom and a ruby in the middle and at the top. Because it matters in which shape players place the ingredients, it will be a shaped recipe. To start, click on 'Create shaped recipe', which should bring you to the following menu:
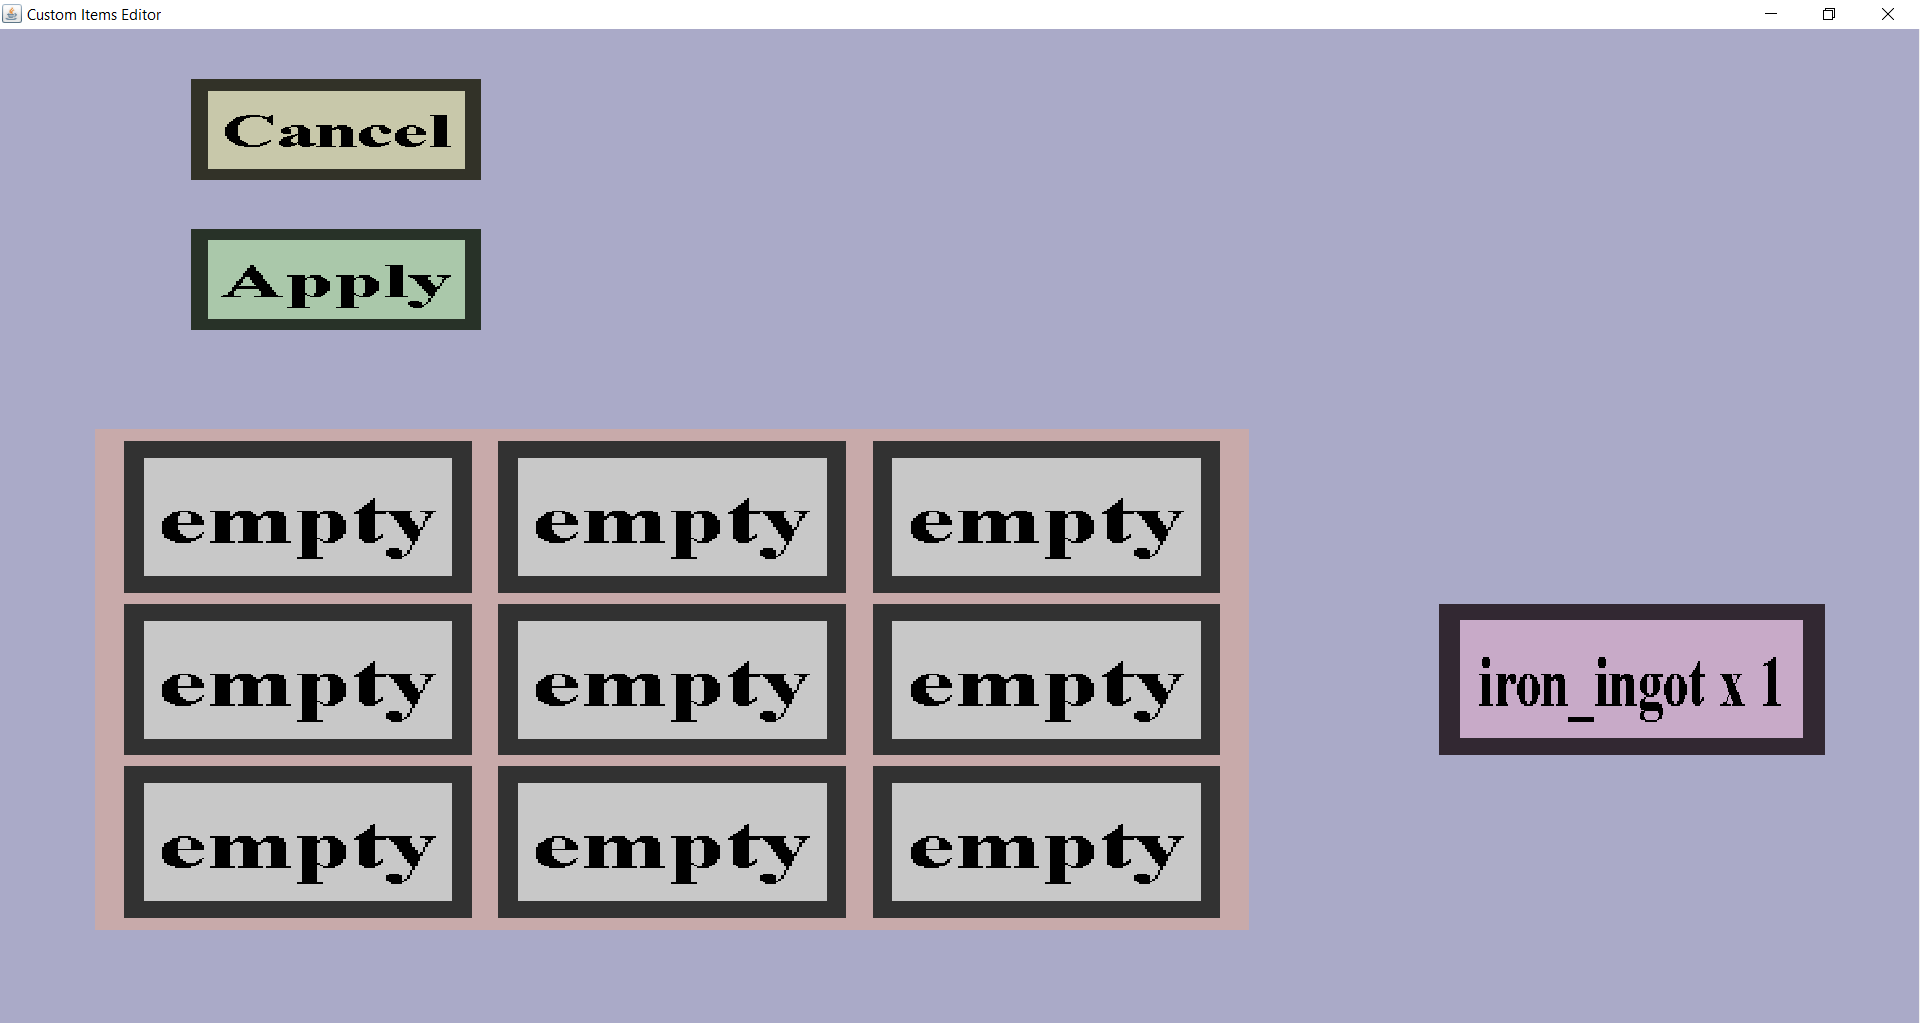
The 9 buttons containing 'empty' are supposed to represent the 3 by 3 crafting grid in-game. The text of the button on the right shows the current result of the crafting recipe, which is an iron ingot by default. But we want the result to be a ruby sword, so click on that button to change it. This should bring you to a menu that seems very familiar. Click on 'Change', then on 'Custom Item', then on 'ruby_sword' and then on 'Select'. Now its time to choose the ingredients of the recipe. Clicking on any button in the crafting grid will allow you to change the ingredient for that slot. Let's start by clicking on the bottom-middle 'empty' button and then on 'Change' and then 'Simple vanilla item'. Type 'stick' in the edit field below the 'Search:' label if you don't like scrolling all the way down to stick. Then click on 'stick'. The middle item in the grid should be a ruby, so click on the middle button, then 'Change', then 'Custom Item' and then 'ruby'. Do the same for the top-middle 'empty' button and then the recipe is done. Click on 'Apply' to finish the recipe and add it to the item set.
Adding the pickaxe recipe is pretty much the same process as adding the sword recipe, so I won't discuss this.
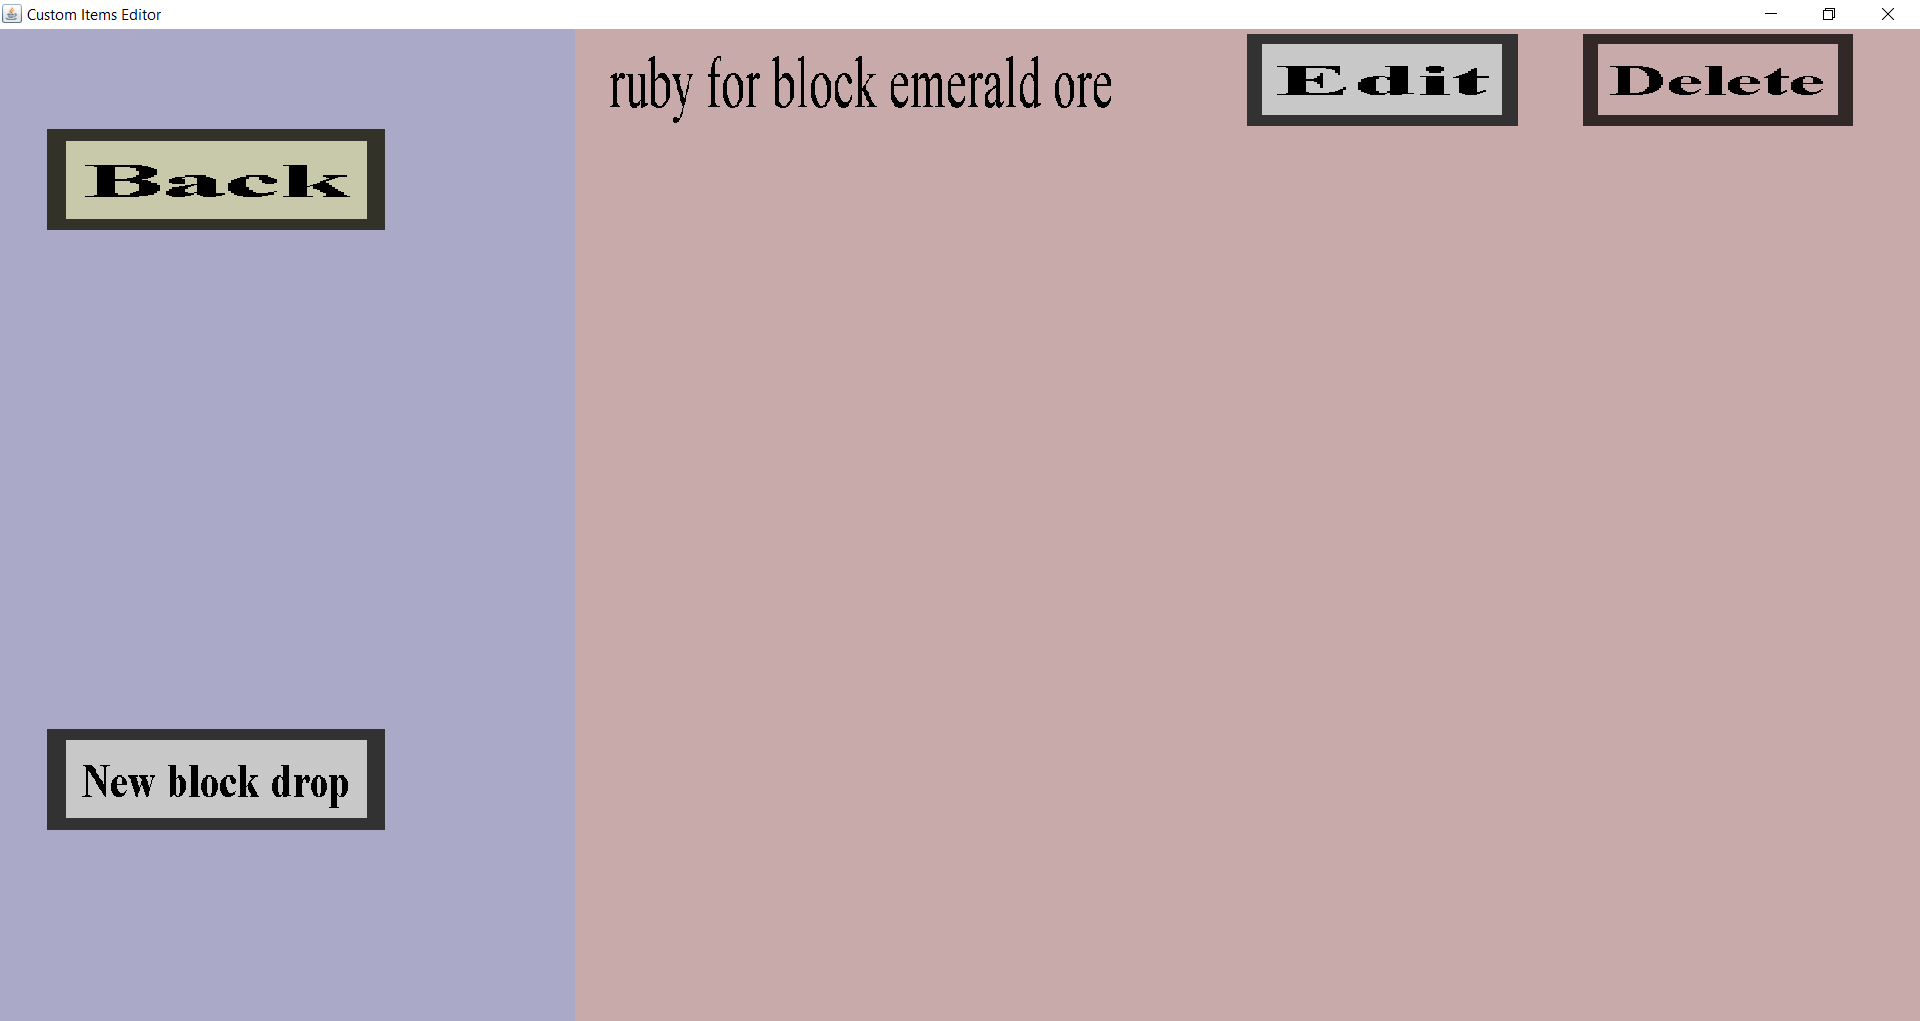
There is a crafting recipe for the ruby, but I will also show you how to add a block drop for the ruby. Block drops allow you to give breaking blocks a chance to drop certain custom items. In this case, I will give emerald ore a 25% chance to drop a ruby instead of an emerald. To do this, click on 'Back' (if you are still in the recipe overview) and then on 'Drops' and then on 'Block drops'. That will bring you to the (currently empty) block drop overview. Click on 'New block drop' to start adding the ruby block drop. You should then see a simple menu to configure the block drop. To change the block that will drop the ruby, click on the button on the right of the 'Block:' label. I strongly recommend using the search field and type 'em' rather than scrolling through the entire list. Then click on 'emerald ore' to choose it. Now that we have chosen the block, it's time to configure the rest of the drop. Click on the 'None' button on the right of the 'Drop:' label. You should then see the following menu:
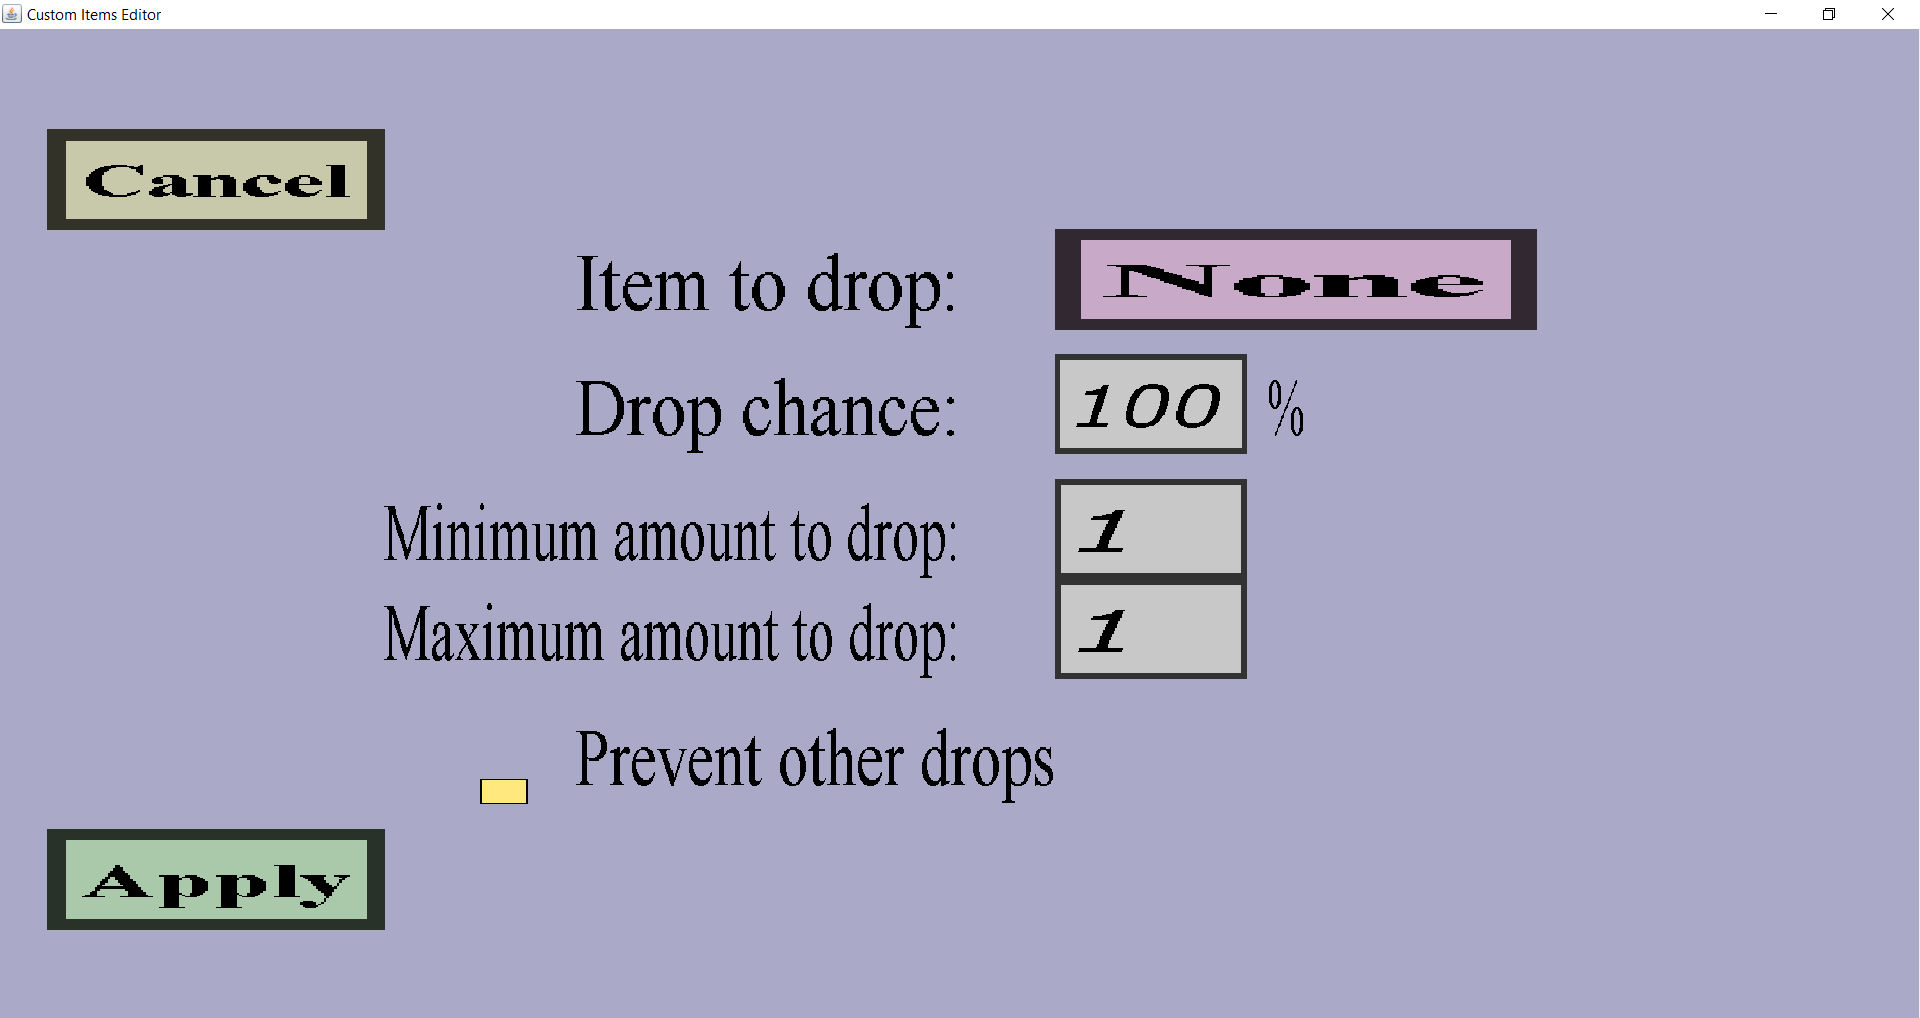
We want it to drop a ruby, so click on the 'None' button on the right of the 'Item to drop:' label and then on 'ruby'. We only want a 25% chance to drop a ruby upon breaking emerald ore, so replace the current 100% with 25%. Since we only want to drop a single ruby each time, we keep the minimum and maximum amount on 1. If you check 'Prevent other drops', no emerald will be dropped whenever a ruby is dropped. If you keep it unchecked, breaking emerald ore will always drop an emerald, but sometimes also a ruby. In this tutorial, I will check it. Now that we have configured everything, click on 'Apply' and then on 'Create'. The block drop should now be shown in the block drop overview:
The item set for this tutorial is now finished. In order to actually use the item set on a server, we need to export it first. First, click twice on the 'Back' button (if you are still in the block drop overview). Then, you need to click on the 'Export' button. If everything went well, you should be brought to the main menu. Then you can click on the 'Exit editor' button, which should close the editor. When you clicked on 'Export', the editor did a few things:
This tutorial assumes that you already have a minecraft server to use the plug-in for. To use the plug-in, you need to download Custom Items and Knokko Core. For custom items, you should pick the latest version (the plug-in, not the editor). In this tutorial, I am using CustomItems 5.5. For knokko core, you should pick the latest version for the minecraft version of your server. The first version after the 'Knokko Core' of each version indicates the minecraft version. You should put both plug-in jars in the plugins folder of your server. (Really, you won't get far without Knokko Core.) Within the plugins folder, you should create a new folder called 'CustomItems'. You need to put the ruby.cis file in that 'CustomItems' folder.
To host your server resource pack, you can use my (experimental) resource pack plug-in. Follow its installation instructions.
If the new and easy way is failing or too slow, you can still use the old way to host a server resource pack. You can find instructions to host a server resourcepack using dropbox at this webpage. If you then visit your server, you should be asked if you would like to have the server resourcepack and you should accept it. If not, check the troubleshooting page.
Once your server has (re)started, you should join it with your minecraft account. If nothing went wrong, everything should work now. When you are asked whether or not you want to use the server resourcepack, you should of course accept it. To test the crafting, pick some emeralds, some redstone dust, some sticks and a crafting table from your creative inventory. Place the crafting table and right click it. When you put the redstone and emerald in the crafting matrix, you should see the ruby in the result slot and be able to take it. Craft a few more to test the ruby sword and pickaxe recipe. You might notice that stacking the rubies won't work well in creative mode, but it should work in survival mode. Finally, you can test the block drops by taking some emerald ore from your creative inventory and place some in the world. Don't bother going to survival mode because custom block drops will also work in creative mode. If you keep placing and breaking emerald ore, a ruby should be dropped soon (but remember there is only 25% per block).
If you encounter problems, please take a look at the troubleshooting page. If you have questions, you can post comments on BukkitDev or discord. This is the invite link for the discord server.